
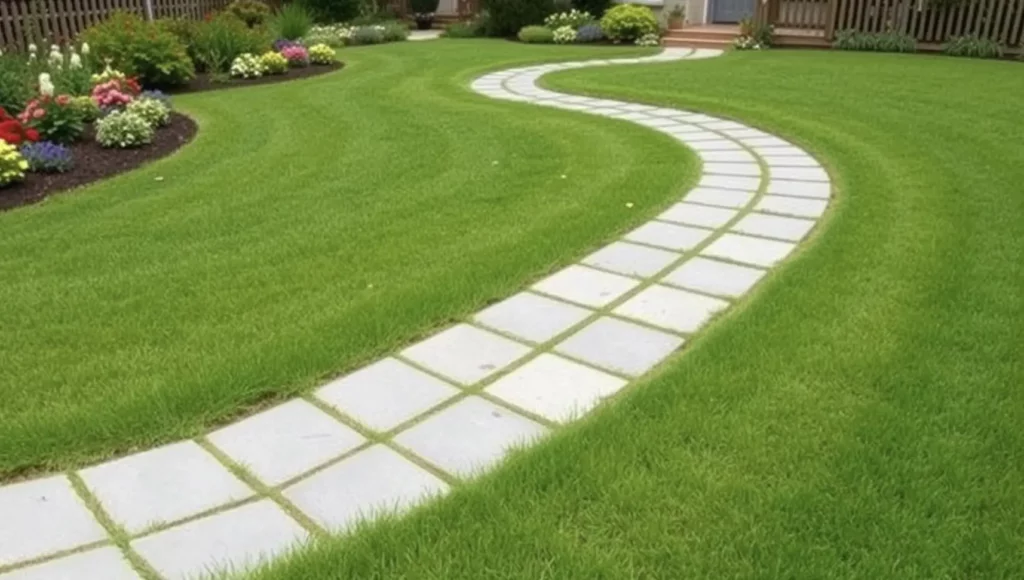
Turning your backyard into a magical retreat is easier than it seems. These 10 easy DIY garden path ideas can upgrade your outdoor space’s look and use. Not only do they add beauty, but they also make you proud of what you’ve built. Whether you need ideas for walkways or guides on making garden paths, we’ve got everything. It’s time to get your hands dirty and transform your backyard into a place that amazes everyone.
Key Takeaways
- Explore a variety of DIY garden paths ideas to elevate your backyard aesthetics.
- Personalize your garden pathways for added charm and functionality.
- Understand the joy and pride of completing a homemade garden path project.
- Witness how simple DIY projects can lead to a complete backyard transformation.
- Use creative landscaping walkway inspiration to make your garden paths stand out.
Introduction to DIY Garden Paths
Creating your own pathways in your garden or backyard brings lots of benefits. This includes saving money and enjoying the process of customizing. Whether you’re new to outdoor projects or a skilled gardener looking for new ideas, making your own garden paths is a fulfilling experience. Let’s explore why DIY garden paths are a great idea and how to begin.
Why Choose DIY Garden Paths?
Choosing DIY garden path ideas mainly saves money. There are many affordable materials you can pick from to stick to your budget. Making your own paths also means they can perfectly fit your garden’s look with unique patterns and materials. Plus, the joy of building something with your hands enhances your connection to your outdoor space.
Tools You Will Need
Starting your garden path project means you need some important tools. Here is a list to get you ready:
- Shovel and Spade
- Garden Rake
- Measuring Tape
- Level
- Garden Hose or Stakes (for guiding the path layout)
- Trowel
- Hammer and Stakes (for securing edges)
With these tools, you’re all set to make your garden walkways easily and efficiently.
Planning Your Pathway
To make successful garden paths, good planning is key. Follow these steps for great results:
- Determine the Path’s Purpose: Decide if the path is for looks, use, or both.
- Sketch the Design: Make a simple drawing of your garden and plan your paths.
- Select Materials: Pick from materials like gravel, stones, pavers, or mulch, based on your design and budget.
- Measure and Outline: Use measuring tape and garden hose or stakes to mark the path in your garden.
- Prepare the Site: Clear the area of debris, make the ground level, and prepare the base if needed.
By following these steps, you’re on your way to creating stunning DIY garden paths that improve your outdoor area.
Creative Backyard Pathways with Gravel
Turning your backyard into a calm and beautiful spot starts with the right paths. Creative backyard pathways with gravel not only look good but are practical and simple to put in. They’re great for adding a quaint or modern feel and make an excellent choice for your next simple DIY task.
Choosing the Right Gravel
When picking gravel for garden paths, consider a few things:
- Stone Size: The gravel’s size impacts the path’s stability and comfort. Smaller gravel, like pea gravel, provides a smoother walk.
- Color: Gravel comes in many colors, from natural browns to bright whites and greens. Pick a color that matches your yard and boosts its beauty.
- Function: Think about how often the path will be used. For busy paths, choose durable materials like crushed stone. It compacts well and stays put.

Installation Tips
Making creative backyard pathways with gravel is a doable weekend project. Follow these tips for a stable and good-looking gravel path:
- Edging: Keep the gravel in place with strong edging materials like metal or plastic. This keeps your path’s edges neat.
- Layering: Begin with a base of large stones or crushed rock for drainage and stability. Then, add your chosen gravel on top.
- Maintenance: Regularly level the gravel and clear debris. Refreshing the gravel every few years keeps it looking new.
With these pointers, putting in gravel garden paths is easy and fulfilling. It turns your backyard into a stylish and useful area.
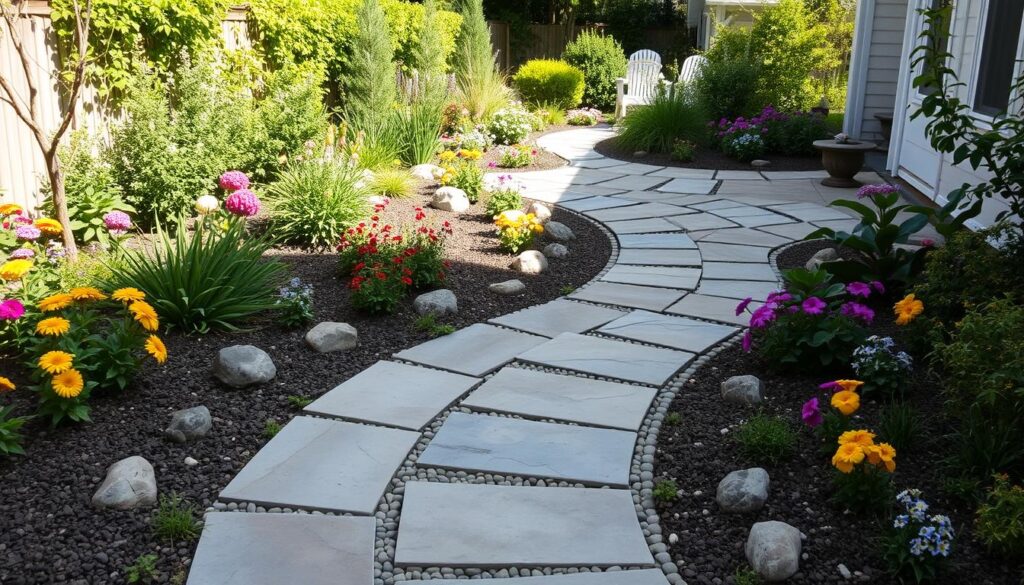
Natural Stone Pathways for a Rustic Look
Adding natural stone pathways can make your garden look rustic and more beautiful. They are strong and bring a natural feel. This feel fits well with many garden designs.
Types of Natural Stones
It’s important to pick the right stone for your pathway. Here are some top choices:
- Flagstone: Its wide, flat pieces offer a smooth, walkable surface.
- Slate: It’s available in different colors and is slip-resistant, perfect for paths.
- Limestone: With its light colors, it looks soft and is easy to shape.

Layout Patterns
How you arrange stones can change your garden’s appearance. Consider these patterns:
- Random Pattern: Mixing stone shapes and sizes for a natural look.
- Repeat Pattern: Using uniform stones repeatedly for a formal appearance.
- Stepping Stones: Setting stones apart to form a simple, pretty path.
Maintenance Tips
Keeping your stone pathways nice is key. Here’s how to care for them:
- Regular Cleaning: Sweeping often helps avoid stains.
- Weed Control: Stop weeds with fabric barriers or natural herbicides.
- Repairs: Replace damaged stones and fix joints when needed.
Stepping Stone Designs for Unique Paths
Make your garden paths unique with creative stepping stone designs. These elements bring beauty and help you walk through your garden. Discover DIY stepping stone projects and layouts that turn any space outdoors into a welcoming area.

DIY Stepping Stone Projects
Starting DIY stepping stone projects lets you bring your style to your backyard paths. This way, you can make stepping stones that really show who you are.
- Personalized Stepping Stones: Use concrete molds and engravings to add names, dates, or favorite quotes.
- Mosaic Designs: Incorporate colorful glass pieces, tiles, or pebbles to craft intricate patterns or simple motifs.
- Themed Stepping Stones: Create designs that align with specific themes such as nature, sea, or celestial elements.
Arrangement Ideas
Placing stepping stones thoughtfully can make your backyard pathway creativity stand out. Here are some tips to do it:
- Random Spacing: Put stones in no set order for a look that feels natural and blends with plants.
- Geometric Patterns: Use shapes like circles or squares to give paths a modern vibe.
- Mixed Materials: Mix stepping stones with different materials like gravel for interesting textures and looks.
| Project Type | Description |
|---|---|
| Personalized Stepping Stones | Add custom engravings or imprints such as names and dates. |
| Mosaic Designs | Use colorful glass, tiles, or pebbles to create artistic patterns. |
| Themed Designs | Create stones that align with specific themes like nature or the sea. |
Easy Outdoor Walkway Projects Using Pavers
Making a beautiful and useful landscape is easy with paver pathway designs. These projects improve your garden’s look and are strong and flexible for your landscaping. They are both pretty and practical.
Paver Materials and Styles
Pavers have different looks because they are made from various materials. Concrete pavers are loved for being tough and affordable. They can be shaped and colored in many ways for lots of design choices. Brick pavers have a classic beauty, perfect for old-fashioned or rustic areas, while natural stone pavers give an elegant and natural feel for a fancier landscape.
Think about these styles too:
- Herringbone pattern, offering strong interlock and visual interest
- Running bond pattern, providing a clean and elongated look
- Basketweave pattern, adding a classic touch with a unique twist

Step-by-Step Installation
To ensure your walkway looks professional, follow these installation steps:
- Preparation: Use ropes or garden hoses to mark the layout. Dig out the path area to a depth of 6-8 inches.
- Base Layer: Put down a 4-inch layer of crushed stone or gravel and compact it well. This layer helps with draining and keeps the pavers stable.
- Sand Layer: Add a 1-inch layer of coarse sand on top and level it off.
- Laying Pavers: Start laying pavers at one corner, keeping even gaps. Use spacers for even spacing and tap them in place with a mallet.
- Edge Restraints: Put in edge restraints to keep the path’s shape. They can be made of plastic, metal, or concrete.
- Finishing Touches: Fill the gaps with joint sand and then compact the pavers again. This makes the path stable.
- Sealing: Seal the pavers to keep them looking good and protect from the weather and stains.
DIY Garden Paths Ideas for Beginners
Starting your garden path project doesn’t have to be scary, even for beginners. Here are some easy DIY garden paths ideas perfect for those just starting out. These easy upgrades can make your garden look better and more useful.
One of the simplest ways to make a garden path is with gravel. Gravel paths look good and are easy to make. You’ll need some basic tools, a sturdy base, and some pretty gravel. First, put down a weed-blocking fabric. Then add a layer of solid base rock. Finish with your chosen gravel on top.
Another good beginner project is a stepping stone path. You can arrange stepping stones in different designs to fit your garden’s look. You can find concrete stepping stones at local stores. Or, make them unique with DIY concrete molds and your own designs.
Using recycled materials is another great option. It saves money and is good for the environment. For example, you can use old bricks or pavers for a beautiful path. Make sure the ground is flat and tight before you start. Lay down your materials and use fine sand to fill the spaces between them.
If you want something more natural, try wood chips or bark mulch paths. They’re simple to put down, drain well, and help stop weeds. Just mark your path, clean the area, and lay a breathable fabric underneath. Then, cover it well with your chosen mulch.
| Pathway Material | Tools Required | Installation Tips |
|---|---|---|
| Gravel | Shovel, Rake, Wheelbarrow | Compact base rock before applying gravel |
| Stepping Stones | Concrete Mold, Trowel | Personalize stones with unique designs |
| Recycled Bricks | Level, Sand, Mallet | Level ground and fill gaps with fine sand |
| Wood Chips | Landscape Fabric, Shovel | Lay fabric before applying mulch |
With these simple garden improvements, changing your outdoor space is easy. These pathways add charm and function to your garden, whether you’re new to gardening or an experienced DIYer.
Wooden Walkways for a Natural Touch
Discover the beauty of wooden walkway designs to add rustic elegance to your garden. These pathways blend well with the natural looks of a garden, giving a warm, organic sensation. To start making your DIY wooden paths, use these tips and ideas.
- Types of Wood: Choosing the best wood is key for long-lasting pathways. Cedar, redwood, and treated pine are great because they resist rot and bugs.
- Construction Tips: Make your wood last longer by using waterproof sealants and rust-resistant galvanized screws. Pressure-treated lumber is also a good option for enduring outdoor conditions.
- Integration into Garden Themes: You can fit wooden walkways into various garden types, like peaceful Japanese zen gardens, country gardens, or sleek, modern looks.
Wooden walkways are great because they naturally enhance the garden’s beauty. They can snake through wildflowers or accent peaceful water areas. DIY wooden paths let you creatively showcase your style.
Mulch Pathways: A Budget-Friendly Solution
Making over your backyard can be budget-friendly. A great choice is mulch garden paths. These paths are an affordable landscaping method that boosts your garden’s beauty.
Different Types of Mulch
Choosing the best mulch is key for your garden paths’ look and effectiveness. Here are some top picks:
- Wood Chips: A popular and good-looking option, wood chips last long and are perfect for paths with lots of foot traffic.
- Bark: It comes in different sizes and offers a polished look. It also fights weeds well and keeps soil moist.
- Straw: Great for short-term paths, straw adds a unique, rustic feel, though it’s not as long-lasting as others.
How to Lay Mulch Paths
Building budget-friendly pathways with mulch is easy. Just follow these steps:
- Clear the Area: Get rid of grass, weeds, or debris where the path will go. A clear path means better mulch coverage and lasting quality.
- Set Boundaries: Use stone, plastic, or metal edgings to keep the path well-defined and stop the mulch from spreading out.
- Weed Prevention: Putting down landscape fabric helps stop weeds, keeping your path clean.
- Spread the Mulch: Apply a 2-4 inch layer of mulch along the path. Make sure it’s even for a smooth look.
- Maintenance: Add more mulch regularly to keep it looking great. Pull out any weeds to maintain a clean path.
Mulch pathways not only look good but are also affordable landscaping choices. Picking the right mulch and installing it correctly lets you create lovely, useful, and inexpensive paths in your backyard.
Brick Pathways: Classic and Durable
Brick pathways have a classic charm that never fades. Their strength and elegance add to any garden’s beauty. They blend durability with style, creating a timeless look. Choosing the right bricks and patterns is key for an impressive and enduring pathway.
For your garden path, pick bricks made to last against weather and wear. Choose those designed for outdoor pathways. This will help keep your walkway sturdy and attractive for a long time.
Picking the right pattern for brick paths is crucial. The favorites are herringbone, basket weave, and running bond. These patterns offer both beauty and strength. They make your path not only look good but also stand up well over time.
Below is a detailed table featuring various brick patterns and their benefits:
| Pattern | Visual Appeal | Durability |
|---|---|---|
| Herringbone | Highly intricate and elegant | Exceptional |
| Basket Weave | Classic and timeless | Very Good |
| Running Bond | Simple and neat | Good |
Adding brick paths to your garden enhances its beauty and offers a sturdy walkway. By choosing the best bricks and arranging them in attractive patterns, you get wonderful, durable pathways. They perfectly complement your garden’s timeless landscape.
Concrete Pathways: Customizable and Long-Lasting
Concrete is great for garden paths because it lasts long and can be customized. You can use different techniques to make durable garden paths that look good and work well. This article shows the many ways you can use customizable concrete pathways.
Concrete Pathway Molds
Concrete molds let you make creative DIY walkways your way. They come in many shapes and patterns. This lets you easily create cool designs. Using these molds, you can get a special look that makes your backyard stand out. Some favorite mold styles are cobblestone, brick, and ones that look like natural stone.
Staining and Coloring Options
Adding color or stain to customizable concrete pathways is really exciting. Stains have lots of colors, so you can match or highlight your garden’s look. Techniques like stamping and etching add texture, making paths more attractive. Whether you choose bright colors or gentle earth tones, your durable garden paths can beautifully blend with your garden design.
Lawn Edging Ideas to Define Your Path
Adding clear boundaries to your garden paths boosts both looks and use. Effective lawn edging ideas can sharpen your path’s look. They also offer clear garden border solutions, making outdoor spaces neat and organized.
Edging Materials
Selecting the correct materials for lawn edging is key. Here are some popular choices:
- Metal: Gives a sleek, modern vibe and is very long-lasting.
- Stone: Provides a timeless and natural look, suited for rustic or classic gardens.
- Plastic: An affordable option that’s simple to use and varied in style.
Installation Techniques
Correctly installing edging materials ensures your path stays well-defined for years. Consider these techniques:
- Trenching: Making a thin trench for the edging material ensures a crisp separation between path and lawn.
- Anchoring: Using stakes or anchors keeps the edging stable and the border even.
- Layering: Putting landscape fabric under the edging stops weeds. This makes the border more durable.
Using these ideas and techniques for lawn edging can lead to a defined and attractive garden path.
Conclusion
Starting to make your own garden path is rewarding. You can go for a cozy, rustic feel with stones or a modern look with concrete. Our guide offers many ideas to help turn your backyard into a special retreat.
Each option, whether it’s brick, mulch, or wood paths, brings its own benefits and beauty. Creating a DIY garden path not only improves your yard’s look but also shows off your personal style. With good planning and the right stuff, you can make your backyard stand out and enjoy every step you take in your garden.
Success in making a garden path comes from mixing creativity with practicality. Get inspired by these ideas and plan your path today. Whether you’re experienced or new to DIY, building your pathway can be a joyful and rewarding project. It can take your outdoor area to the next level. Happy crafting!
FAQ
What tools will I need for DIY garden path projects?
You’ll need basic items like a shovel, wheelbarrow, and garden rake. Also, a tape measure, level, tamper, and edging materials are key. The tools may change with different path types.
How can I plan my garden pathway effectively?
Start by measuring the area and picking the right materials. Then, think about the design and how it fits with your garden. Consider what the path is for, the ground it covers, and how it looks with everything else.
Do you have any installation tips for gravel pathways?
First, lay landscape fabric to stop weeds. Then, add crushed stone for drainage. Use edging to keep gravel in place and rake the path to keep it smooth.
What types of natural stones are best for garden pathways?
Flagstone, slate, and limestone are great for paths. They offer different looks and textures for your garden.
Can you suggest some creative layout patterns for stone pathways?
Try random, running bond, herringbone, or basket weave patterns. Each offers a unique look, from rustic to elegant.
How should I arrange stepping stones in my garden?
Space them for easy walking and let them flow with your garden’s layout. You can set them in patterns or place them randomly, whatever fits your style.
What DIY garden paths ideas are suitable for beginners?
Easy projects include gravel paths, mulch trails, stepping stones, and paver kits. They don’t need many tools or much know-how.
Why are brick pathways a good choice for gardens?
Brick paths are beautiful, strong, and easy to keep up. They handle a lot of use and different weather well, making them a solid choice for gardens.
How can I customize concrete pathways for a unique look?
Use molds for special shapes and patterns. Add color with stains or dyes, and texture with stamps or etching for a personal touch.
What are some lawn edging ideas to define garden paths?
Choose from metal, stone, plastic, or brick edgings. Install by digging a trench, placing the edging, and securing it to clearly separate the path from the lawn.